While the masses occasionally treat their vehicles to a cleansing shower, a surprising number of car enthusiasts tend to leave their four-wheeled companions high and dry when it comes to a good waxing. Waxing your car is like giving it a spa day. Aside from emerging this session with a beautiful look, waxing also protects the paint from dirt and grime, as well as the sun’s UV rays and oxidization. That’s why we’ve put together the ultimate car waxing guide, training you how to wax a car in just seven steps.
Now, we won’t sugarcoat it; waxing your car isn’t exactly a walk in the park. It’s more like a brisk jog with a side of elbow grease. The plus side is the result – a stunning look and shine.
In this article, you will learn how to wax your car. Consider following these seven steps of our car waxing guide so your car can turn heads at every corner. You will transform your car from “Oh, that’s nice” to “WOW, that’s spectacular.”
Here are the products you’ll need:
Soap and chamois: These trusty companions protect your car from the usual road grime. Soap will make sure your car is clean before the waxing.
High-quality car wax: This is your secret sauce, or the VIP pass, to a show-stopping shine. Remember to be picky about your wax.
Wax pad: Think of this as the brush for your canvas. A wax pad is your tool of choice for applying the wax.
Microfiber towel: This towel will be your go-to for buffing and bringing out that mirror-like finish.
Soft detailing brush: For those nooks and crannies
Random orbital buffer (optional): This adds a layer of polish to your waxing work.
Here is the Ultimate Car Waxing Guide (7 Simple Steps)
Step 1: Secure High-Quality Automobile Wax
Now, let’s talk about the heart and soul of your car waxing process – the wax itself. It’s like choosing the right paint for an artist; the quality and type of wax can make all the difference. In the world of car wax, you’ve got two contenders: carnauba-based car wax and the suave paint sealant. Consumer Reports published the best car wax buying guide.
Carnauba Wax: This wax consists of Brazilian palm tree leaves. Carnauba Wax gives a car that premium, high-quality shine.
Paint Sealant: Now, this one’s a bit different. It’s a polymer-based wax. Paint Sealant gives a long-lasting shine and added protection.
You’ll find these products at a big box store or auto parts retailer. It is a smart move to pick a waxing product that sits comfortably in the middle of the price range. This sweet spot is likely where quality will meet affordability.
You’ll notice that car wax comes in different forms. There’s the classic small tub, but you’ll also find it strutting its stuff in spray and liquid form.
Step 2: Prep Your Canvas – Wash Your Car
Before we dive into the actual car wax application, we’ve got some prep work done.
Cleanliness Is Key: Your vehicle should be as clean as possible before you apply wax. There are two ways that you can do this. You can either whisk your ride off to a car wash. In this case, the pros will give it a thorough cleanse. The second option is to wash it yourself That’s right. A good DIY. Either way, you want to get rid of dirt and grime.
The Scratches Snare: Here’s the deal – starting with a squeaky clean car is not just about aesthetics. It’s also about protecting your car’s clear coat. Any lurking dirt or grime can turn into scratch-inducing villains when you apply wax.
The Details: Make sure to clean all parts of the car. It includes the door jambs and door handles. These spots often get neglected but are equally deserving of car care attention.
The Final Countdown: Ensure your car is completely dry before you think about waxing.
Step 3: Read the Instructions on the Car Wax Package
Depending on the brand and type of wax you pick, there might be some unique instructions on how to apply.
Each car wax brand and variant can have its dos and don’ts. As such, it’s vital to read the instruction manual. You know, that little booklet or leaflet that comes with the wax package, often overlooked but packed with golden nuggets of wisdom.
By following the manufacturer’s recommended usage, you’re ensuring that you’re on the right track to achieving that sparkling, jaw-dropping finish.
Go through those instructions diligently and familiarize yourself with any guidelines. It’s a small step that ensures you’re ready to wax your car.
Step 4: Apply Wax to The Pad
Now, it’s time to grab your chosen car wax product and prepare to load up your waxing pad.
For Wax Paste Users: If you’ve opted for the wax, you’ll want to start by unboxing the package. Once it’s open, you’ll find the pad. Under the pad, you’ll find a second lid that conceals the wax itself.
For Liquid Paint Sealant Advocates: Now, if you’ve gone with the liquid paint sealant, the game plan is slightly different. You’ll apply a small amount of this liquid wax directly onto your waxing pad. And that’s it.
Here’s the car waxing tip for wax paste and liquid paint sealant users – start with a modest amount of product. As you continue to wax your vehicle, the pad will gradually become more saturated with the precious product. So, there’s no need to go overboard with the wax from the get-go. It’s all about a balanced approach. This step ensures that you’ve got enough to work.
With your wax pad ready, you’re just one step away.
Step 5: Choose Your Starting Point – Waxing in Sections
Now that you have loaded your pad with the car wax ready, it’s time to move on to our next step in this car waxing guide. It’s important to wax your car in sections. Aside from helping you keep track of your progress, this section strategy prevents the wax from overstaying in one spot.
Let’s break it down:
If you let the wax sit on your car for too long, it becomes tricky to remove. It’s like when a glob of glue dries out. While leaving the wax on your car for a long time won’t harm your car’s paint, it will make the removal process feel like a CrossFit workout.
The Section Strategy: To prevent the wax from drying up in one spot, you want to divide. The best way to wax your car is to begin with one section of your vehicle. We recommend starting from the front fender panel above the front wheels. You can then extend to the front of the car. From there, it’s like a tour around the vehicle, one section at a time, until you’ve waxed the entire car. By adopting this section-by-section approach, you ensure that the wax is always in its prime condition.
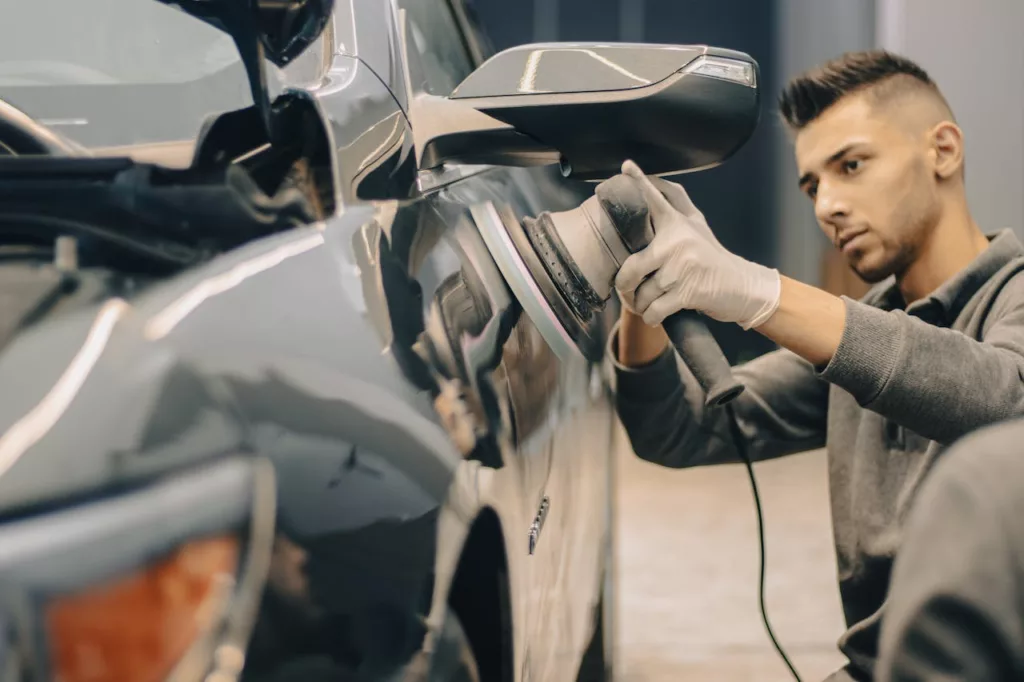
Step 6: Start Waxing Your Car – With Circular Motions
It’s time to embrace the art of circular motion. The key here is precision. Applying the wax in circular motions ensures that a delicate layer of wax is evenly spread onto the section of your vehicle.
The magic happens with a small, circular motion. You want to ensure that wax is applied evenly to the section.
Now, as you work your waxing magic, you can choose your path. You can opt for horizontal rows of circles or go vertical; the choice is yours. The goal is to cover the entire area meticulously.
Here’s another golden rule – avoid going overboard with the wax. Less is often more. What you’re aiming for is a thin layer where you can still catch glimpses of your car’s paint color peeking through the wax.
As you apply the wax with your circular motions, observe the transformation. Within a couple of minutes, you’ll notice the wax starting to dry. How do you know when car wax is dry? When the wax is dry, it takes on a matte appearance and feels somewhat chalky to the touch.
Step 7: The Grand Finale – Removing the Wax
The wax removal process is like the red carpet moment for your car, where it transforms into a shining star. To remove the car wax, you will need a microfiber towel, chamois, or any other soft cloth.
Here’s how to remove car wax:
Begin by placing your soft cloth on the stage, and with gentle pressure, start the wax removal process.
Remember the circular motions you utilized when applying the wax? Use a circular motion to remove the majority of the wax. And make sure that every trace of the wax is gone.
Now that the wax is gone, it’s time to shine the car. In this case, buff the car using a fast, circular motion to enhance the paint shine.
As the wax vanishes, your car’s surface should appear shiny. Next time you take a road trip, your car will command attention and admiration from everyone who sees it. And that’s the car waxing guide. All in seven steps.
Image Credit: Esmihel Muhammad