There’s nothing more exciting than owning your dream car. But, to keep it in tip-top shape, you need to regularly maintain your car. Good Maintenance for your car is as important as your health is to you. Maintaining your car is a rewarding endeavor, and one fundamental task that every car owner should master is changing the oil, especially before you go on a road trip. While most people typically contact professionals for the job, you can also do it by yourself. We’ve put together a DIY Car Oil Change Guide to help you every step of the way.
In this step-by-step guide, we’ll walk you through the 20-step DIY process of a car oil change, demystifying the procedure and providing valuable insights into essential maintenance practices.
Here’s a Step-by-Step Car Oil Change Tutorial.
Step 1: Put Your Car In Park
Begin by parking your vehicle on a flat surface, engaging the parking brake, and turning off the engine. We recommend lifting the front of the car by driving it onto a ramp. You can also lift the car with a jack and support it securely with jack stands.
CAUTION: Never go under a vehicle supported only by a jack. It’s recommended to use wheel chocks to prevent the wheels on the ground from rolling.
Step 2: Pop The Hood Open
Open the car hood.
Step 3: Locate the Dipstick
Find the engine oil dipstick and remove it. This step aids the smooth flow of oil during the draining process.
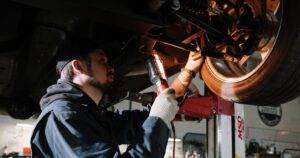
Step 4: Move Under The Car
Wear safety glasses and carefully move beneath the car to locate the engine’s oil pan. Refer to your owner’s manual for guidance.
Step 5: Locate Oil Drain Plug
Identify the oil drain plug, a long bolt head situated at the bottom of the pan. This plug facilitates the drainage of oil from the pan. Note: Some vehicles may have two drain plugs.
Step 6: Place the Oil Drain Pan Under The Car
Place a container beneath the drain plug. Ensure the catch pan has sufficient capacity to contain the expected volume of oil draining from the engine. If you’re unsure of the size, consult your owner’s manual to determine the specific oil volume your car requires.
Step 7: Let The Oil Out
Using a box-end wrench or a 6-pt. socket, gently loosen the drain plug. Remove the plug by hand, ensuring the catch pan is directly beneath the plug hole. Expect a rapid flow of oil, so be patient and allow several minutes for all the old oil to drain out. Refer to your vehicle owner’s manual for more details.
Step 8: Wipe Residual Oil
Using a rag, wipe clean the threads of the oil pan and the oil drain plug. Visually check the condition of both the oil pan and the plug threads and gasket. If you have any concerns about the plug’s condition, consider buying a replacement. If necessary, replace the drain plug gasket (some OEMs recommend this step). Once the oil has completely drained, reinstall the oil drain plug and securely tighten it using the correct box-end wrench or 6-pt. socket, following the torque specifications provided in your owner’s manual.
Step 9: Locate Oil Filter
If the old and new oil filters differ, double-check the application to ensure you have the correct filter. Refer to your vehicle’s owner’s manual for additional information.
Step 10: Place An Oil Catch pan
Place an oil catch pan beneath the oil filter to capture any remaining oil inside the filter. Position it carefully.
Step 11: Drain Oil From Filter
Use an oil filter wrench to gently loosen the oil filter or oil filter cap, letting the oil drain from the filter.
Step 12: Remove Oil Filter
While removing the oil filter, make sure that the filter gasket has come off with the filter. If it’s still attached to the engine mounting plate, remove it along with any remaining residue.
Step 13: Add Fresh Oil
Apply a thin layer of fresh oil to the gasket of the new oil filter to facilitate a smooth installation of the engine. It’s important not to use grease in this step. Install the new oil filter by hand, turning it in a clockwise direction. Once the oil filter gasket makes initial contact with the mounting plate gasket surface, tighten the filter according to the instructions specific to your application. Typically, this involves turning the filter three-quarters to one full turn after the gasket contacts the engine. (Please note: Cartridge oil filter replacement procedures may vary; consult your owner’s or service manual for specific instructions.)
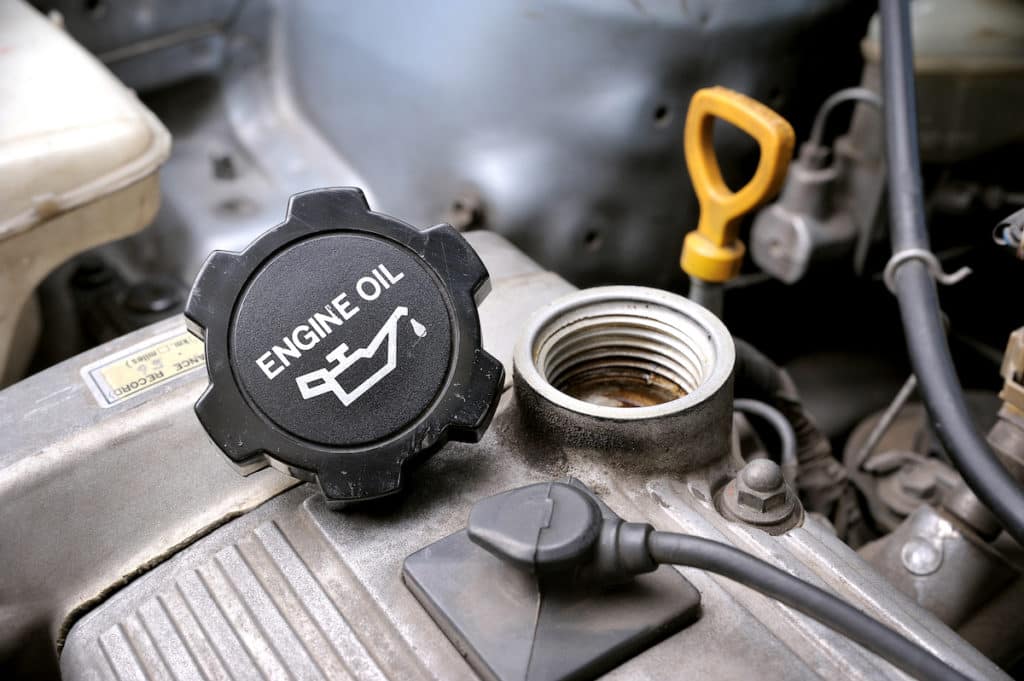
Step 14: Remove the Oil Fill Cap
Open the hood and take off the oil fill cap. Using a funnel, pour the appropriate amount of motor oil with the correct viscosity into the engine. Refer to your vehicle’s owner’s manual for the recommended grade, specification, and amount.
Step 15: Put The Filter Back
Put the oil fill cap back in place.
Step 16: Start The Engine
Start the engine and let it run at idle for at least 30 seconds. Cautiously check under the vehicle for any signs of oil leaks, paying close attention to the areas around the oil drain plug and oil filter. If you notice any leaks, turn off the engine promptly and arrange for the necessary repairs.
Step 17: Turn Off The Engine
Turn off the engine and wait for 30 seconds to allow the oil to settle in the engine. Thoroughly inspect the area beneath the vehicle once again for any oil leaks.
Step 18: Lower The Vehicle
Lower the vehicle safely to a level surface.
Step 19: Check Oil Levels With Dipstick
Insert and then remove the oil dipstick, checking for the correct oil level. Add more oil if needed. Consult your vehicle’s owner’s manual for information on oil capacity and the recommended oil level on the dipstick.
Step 20: Repeat Steps If Necessary
If necessary, repeat the oil change using motor oil per the manufacturer’s guidelines.
Note: These instructions serve as general guidelines. For specific details on changing the oil and filter for your vehicle, please refer to your owner’s or service manual. Exercise extreme caution when lifting or jacking any vehicle
DIY Car Oil Change Guide: Frequently Asked Questions (FAQs)
How often should I change my car’s oil?
It’s generally recommended to change your car’s oil every 3,000 to 5,000 miles but check your vehicle’s owner’s manual for the manufacturer’s specific recommendations.
Can I change my car’s oil myself?
Yes, changing your car’s oil can be a DIY task. Follow the steps outlined in your owner’s manual and ensure you have the necessary tools and equipment.
What type of oil should I use for my car?
Refer to your owner’s manual for the recommended oil grade and specification. The manual will guide you on whether to use synthetic or conventional oil.
How do I know if my oil filter needs replacement?
Replace the oil filter during each oil change. If you notice any damage or if it’s been in use for an extended period, consider replacing it sooner.
Can I reuse my oil filter?
It’s generally recommended to use a new oil filter with each oil change. Reusing filters can lead to decreased efficiency and potential engine damage.
How can I safely dispose of used motor oil?
Take used motor oil to a recycling center or an auto parts store that accepts used oil. Do not dispose of it in the trash or pour it down drains.
What if I overfill the oil during the change?
Overfilling can lead to engine damage. If you’ve overfilled, drain the excess oil until you reach the correct level.
Can I switch between synthetic and conventional oil?
Yes, but it’s essential to follow the manufacturer’s recommendations. Some vehicles are designed for specific oil types.
How do I check for oil leaks after an oil change?
Run the engine for a short time, then inspect beneath the vehicle for any oil leaks around the drain plug and oil filter.
What if I’m unsure about changing my car’s oil?
If you’re unsure or uncomfortable with changing your car’s oil, consult a professional mechanic or refer to your vehicle’s service manual for guidance.